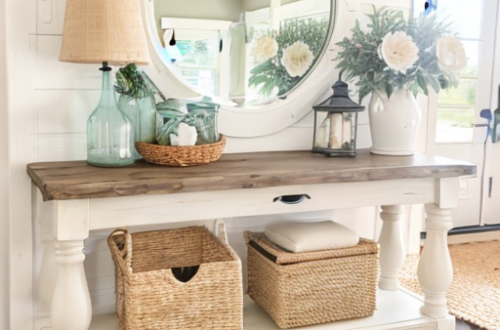
DIY Coastal Furniture
Dreaming of a coastal paradise in your home without buying brand new coastal furniture?
Then transforming your existing furniture is the key!
Embrace the power of paint and get creative to achieve that coastal aesthetic. By simply transforming the color and texture of your current pieces, you can instantly bring a coastal vibe to your room without the need for costly replacements.
So, roll up your sleeves, grab some paint, and let your furniture become a canvas for coastal inspiration!
In this article, we explore two affordable methods to achieve a coastal look.
2 Ways to Give Achieve a Coastal Furniture Look
One of the most effective and cheap ways to get a coastal look in your home is by painting your furniture. In this article, we’ll discuss two methods of painting furniture for different styles:
Distressing for a beach rustic style, and whitewashing for a more farmhouse coastal look.
These methods give the furniture a rustic, weathered, aged appearance.
Choose the method that best suits your style and start transforming your furniture for an easy, affordable coastal home.
Let’s dive into the techniques:
Preparing the surface
Regardless of the method and style you choose, you’ll need to prepare the surface before adding paint. Even if some paints say you don’t need to sand or add primer, light sanding helps remove grease and dirt making the paint stick better and evenly.
If you don’t want the piece to look damaged, fill any holes with wood filler and sand it once dried.
Cleaning and sanding your furniture properly
Use a soft cloth with mild soap and water to gently clean the surface. Be sure to rinse well with water and dry with a clean cloth.
Once your furniture is dry, use fine-grit sandpaper to create a slightly rough surface that will allow the paint to adhere better. Sanding also helps remove any old paint or varnish that may be on the surface of the wood.
Sand in the direction of the wood grain, using long strokes rather than circular motions. Start with a coarser-grit sandpaper, especially if the wood has big scratches and you don’t want them, then move on to finer grits until you have achieved the desired smoothness.
Filling in any cracks or holes
Next, inspect your furniture for any cracks or holes that need to be filled before painting. Use an appropriate filler material such as wood putty or spackle depending on whether your furniture is made from wood or another material. To fill in cracks, start by scraping out any debris or loose material using a putty knife.
Then apply filler material with a putty knife, smoothing it out along the surface of the crack so it is flush with surrounding areas. For larger holes, cut away any damaged areas with a utility knife so you have clean edges before filling them in. If you want to replace the hardware but don’t want to look for pulls and handles that match the existing holes, fill the holes now.
Apply filler material in layers, allowing each layer to dry completely before applying another layer until you reach level ground. By thoroughly cleaning and prepping your furniture before painting it for a coastal look; you are ensuring that everything adheres properly and lasts for a long time!
Now it’s time to be artsy!
Method 1: Distressing Furniture for a Rustic Coastal Look
Distressing is a technique that involves creating a weathered, worn-out look on furniture, giving it a rustic and beachy vibe, using two different color paint coats.
There are several ways to achieve the distressed look: by sanding, applying Vaseline or wax in some areas so the paint doesn’t hold, painting with a dry brush, or rubbing the top coat with a wet rag.
Here are the steps involved in distressing furniture to achieve a beachy coastal look:
Materials
- Sandpaper (Medium to Fine)
- Paintbrushes (various sizes)
- Paint (in desired color)
- Tack cloth or microfiber cloth
- Primer (optional)
- Wax or sealant
Choose the Right Furniture
Not all furniture is suitable for distressing. Choose a piece of furniture made of solid wood or a sturdy material. Furniture with intricate designs, carvings, and moldings works well with this technique. Grainy wood will give a really rustic look.
What colors to choose?
To achieve a coastal look you can choose a blue base with a white top coat or vice versa, or use a wood stain as the base coat and white or blue for the top coat.


Step 1: Applying a Base Coat
Apply a base coat of paint to the furniture. Choose a light color that matches your coastal theme. For example, light blue, mint green, or white are good options. Allow the base coat to dry completely.
Step 2: Applying the Top Coat
When the base coat dries, apply a top coat of paint in a different color, like a preferred blue over white; or white over wood stain. Use a paintbrush or roller to apply the top coat of paint.
Step 3: Sanding the Furniture Again
When the top coat of paint is dry, use medium-grit sandpaper to lightly sand the edges and corners of the furniture. Sand the areas where wear and tear would naturally occur over time. Be careful not to overdo it, as you want to achieve a natural-looking distressed effect.
Step 4: Applying a Sealer
To protect the furniture and give it a finished look, apply a clear sealer. Choose a matte finish to maintain the natural, worn look of the furniture. Before using the furniture, make sure that the sealer is completely dry.
Distressing furniture is a great way to give your home a coastal look. With the right techniques, you can make new furniture look old and weathered. By following the steps outlined above, you can achieve a natural-looking distressed effect that adds character and charm to any room.
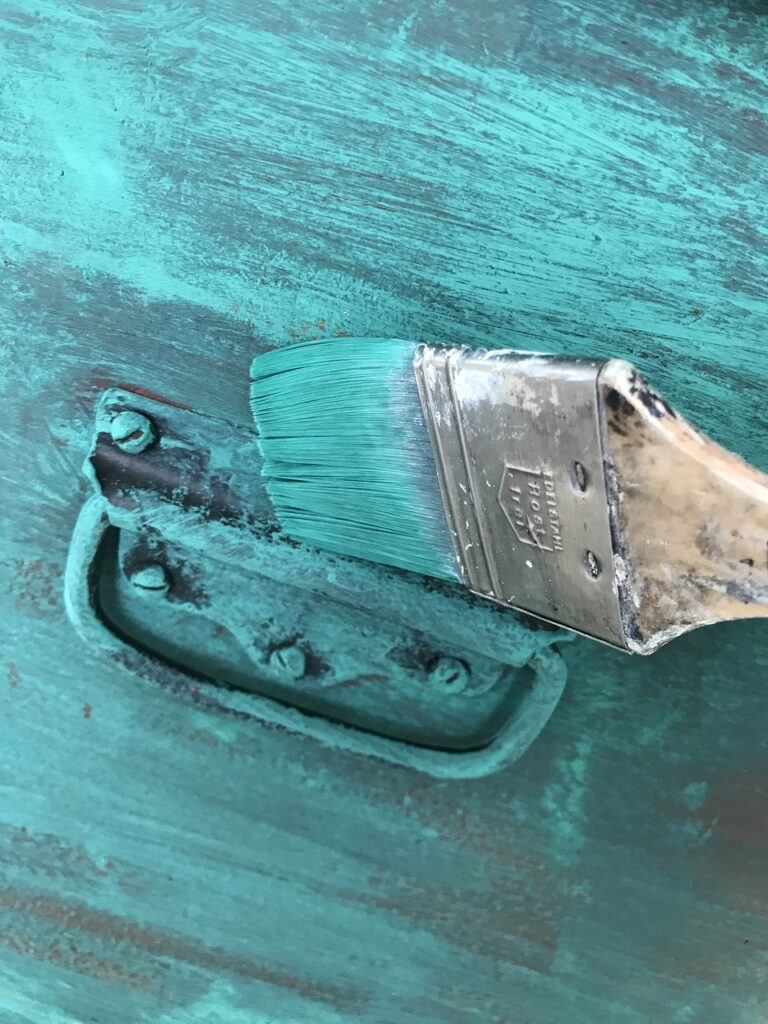
Method 2: Whitewashing for a Coastal Farmhouse Look
Whitewashing is a technique that involves painting the furniture with a translucent white color, giving it a faded, coastal look. This technique works best on furniture that has natural wood or a light-colored finish. To achieve a whitewashed look, dilute white paint with water, so the paint is thin enough to allow the natural grain and texture of the wood to show through.
Here are the steps to follow for whitewashing furniture:
Materials
- Sandpaper
- Painter’s tape
- White paint (latex or chalk paint)
- Water
- Paintbrush
- Clean cloth
Step 1: Sand the Furniture
Use sandpaper to rough up the surface of the furniture. This step will help the paint adhere better and create a more textured, rustic look. Wipe away any dust with a clean cloth.
Step 2: Apply Painter’s Tape
Apply painter’s tape to any areas that you don’t want to get whitewashed. This could include the edges of drawers or any hardware on the furniture.
Step 3: Mix the Whitewash
Mix white paint with water in a ratio of 1:1. The amount of water you add will depend on how opaque you want the whitewash to be. Test the mixture on a small area of the furniture before proceeding to make sure you like the effect.
Step 4: Apply the Whitewash
Using a paintbrush, apply the whitewash to the furniture in long, even strokes. Work in small sections and wipe away any excess paint with a clean cloth. For a more distressed look, you can apply the whitewash unevenly or use a dry brush.
Step 5: Let it Dry
Allow the whitewash to dry completely before moving on to the next section of furniture. If you want a more opaque finish, you can apply a second coat of whitewash.
Step 6: Sand the Furniture Again
Once the whitewash has dried, use sandpaper to lightly sand the surface of the furniture. This will remove any excess paint and give it a more weathered look.
Step 7: Seal the Furniture
After sanding, wipe the furniture with a clean cloth to remove any dust. Then, apply a clear sealant to protect the paint and give it a finished look
Final touch: Add coastal furniture hardware
Now that you have painted your furniture in a coastal color and given it that weathered feel, it’s time to give the last touch: add coastal-style hardware.
For a rustic look, choose black cast iron or bronze finished rings or shell pulls. If you want to give the furniture a chic touch, choose brass pulls and handles.
To make it right, measure the distance from one hole to the other and look for pulls or handles that match the same distance between holes, or fill the holes with wood filler before painting the piece and choosing any hardware.
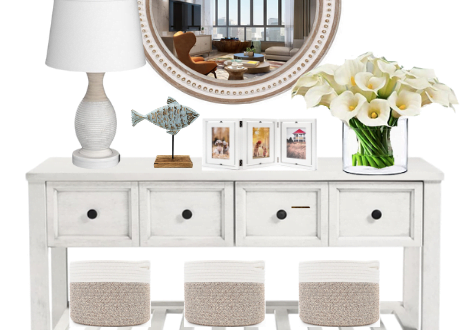
Putting it all together
Achieving a coastal look in your home doesn’t have to be costly. Just by painting your furniture using the distressing or whitewashing techniques, you can achieve a beachy rustic or coastal farmhouse look without breaking the bank.
Say goodbye to plain furniture and embrace the coastal vibes!
Remember to prepare the surface, choose suitable colors, and seal the final result for long-lasting beauty. With these simple steps, you can transform your space into a coastal oasis and enjoy the calming atmosphere of the beach right in your own home. Get ready to create your own budget-friendly coastal style!


You May Also Like

How to Style a Coffee Table Coastal Style
3 Beautiful Coastal Console Table Decor Ideas